Our shared vision for this event was to ride our bikes, have fun in the sun, and raise funds for a good cause.
We had an excellent time on July 29th doing all three!
In their own words, Free Range strives "to provide kindness, excellent technical support, thoughtful products, and reliable workmanship to people who are excited about bicycles".
This shop is always seeking ways to give back to their Seattle community and they chose local nonprofit Bike Works as the recipient of our raffle proceeds.Once we got to the beach, everyone enjoyed some beverages courtesy of our friend Joseph from Cascade Bicycle Studio and his cooler-equipped trike.
Nothing quite like a sunset and hanging with pals after an evening of bike fun for a good cause. We hope you had a great time at the event!
Thanks again to our awesome hosts, Free Range - and a special shoutout to Joseph/Cascade for your support!
Words: Kate Echols Moore
Photos: Tim Wesolowski and Joseph McKean
Portland Design Works has a long history of hosting lively, bike-focused events in our backyard. From Circulus to the All City x PDW shindig, we've made many excellent memories over the years. After a few years of social distancing and solo rides we were feeling a bit overdue for some good times, so we made up our minds that 2023 would be the year that PDW rides (in a group) again! (Once the rainy season subsided, of course.)
A longtime partner of PDW, Metropolis Cycles is known in our community for their support of cyclocross racing, local trail maintenance, and just generally being welcoming and inclusive to all riders. We wanted to host an event together to raise funds for a good cause AND host a ride that would be accessible to a wide variety of riders, so we came up with the Urban Ramble Ride and Raffle!
Thanks again to everyone who joined us, and a special thanks once again to our awesome hosts at Metropolis - Brad, Archie, Shawn, Matt, Dillon, Ty and Sara! We’re already looking forward to next time.
Cheers!
Words: Kate Echols Moore
Photos: Tim Wesolowski
]]>Back in 2008, there were primarily two types of bicycle accessories. One type was performance-oriented, designed to be lightweight and/or aerodynamic with promises of speed or endurance gains for the user. The other type was utilitarian, designed to fulfill specific tasks such as holding a water bottle or panniers, all at an affordable price. But in the realm of bicycles, more than just performance and utility bikes were being created at that time. In 2008 there were dozens (hundreds?) of custom frame builders crafting bikes that weren’t lightweight or simply utilitarian. They were beautiful. They were fun. They were cool. They made people want to ride! I wanted to do the same thing in the realm of bike accessories- create fun, beautiful, high-quality products that inspire people to ride. So I recruited a couple of talented friends, sold my house, and started Portland Design Works.
Fifteen years later, PDW is still creating fun, beautiful, high-quality gear for everyday riding. Besides inspiring people to ride by making cool stuff, we’ve consistently donated at least 1% of our top line revenue every year to nonprofit organizations that improve cycling access and infrastructure in their communities. We take great pride in that.
Finally, I want to sincerely acknowledge that the survival and resilience of PDW through all of the ups and downs of 15 years in business would not have been possible without the help and support of our customers, manufacturing partners, families, friends, bike shops, creatives, the Portland cycling community, and everyone who has been on the PDW Crew over the years. Thank you all so much. I feel extremely grateful. Thanks for coming along for the ride.
-Erik Olson, Co-founder
Below left: PDW Crew 2008 - Lars, Erik, and Dan
Below right: PDW Crew 2023 - Lars, Kate, Lise, Chris, and Erik
We've changed offices a few times and as anyone who has ever moved knows, it isn't a whole lot of fun. Luckily we've always had generous friends and co-workers willing to lend a helping hand and get us through it. Clockwise from upper left: Date night on the curb while taking a break from office painting, Andy and Michael come straight from lawyering to climb scaffolding and paint, Dan grinds down old anchor bolts in the floor.
Early concepts for the icon portion of the PDW logo:
A couple t-shirts from the '00s:
Sketches our friend Leah made for us which we overlaid onto photos for grip packaging:
Our original 2008 website concept. Another of Leah's sketches is overlaid on a photo for the hero image:
Original sketch and 3D rendering of the 3wrencho, one of our first products:
Mini pump with bamboo handle concept art. This would eventually become the Little Silver pump.
Our Panda Treat grips (circa 2009), which we did in a pink colorway for some reason:
Some wild light packaging concept artwork for the Spaceship and Danger Zone lights by Shin Tanaka.
Design for a front basket that we realized would be waaaaay too heavy even before we tried a prototype:
High concept packaging for the Radbot 1000 taillight that never saw the light of day because it was too time consuming and overly complicated to fold the cartons:
We've done a lot of goofing around in the warehouse over the years. Basketball has probably been the most popular activity but we've also played a little wiffle ball, hockey, and a long stretch where we constantly played ping pong.
We've been incredibly lucky to have many very good dogs help out in the office and warehouse:
The popularity of our products in countries outside the USA has given us the opportunity to ride bikes abroad in some lovely cities. Here are a few from Osaka where our Japanese distributor Teisuke showed us around the town:
Most PDW gear is manufactured in Taiwan by folks we have now worked with for 15 years. These companies took a chance on us when all we had were a binder of designs and a dream. They helped us open tooling for new products, extended loans when times were lean, and worked with us to make our ideas become reality. Over the course of countless meetings, dinners, hikes, and bikes rides we've forged wonderful friendships and always look forward to the next trip. (Also the food is sooo good.)
Below: Monkeying around, tea time, motorcycle touring, climbing the "carp's back," celebrating Halloween on the Taipei subway, setting a Taiwan Beer pyramid unofficial world record.
In the summer of 2012 we put together a little video of community events we were involved in. Perfect vibe.
Watch the video below for the full story but the super short version is that in 2010, PDW co-founder Dan saw that this kid down in California had created a circular mini velodrome called "Circulus" and needed to get rid of it. He hatched a plan to fly to Los Angeles, buy this thing, drive 14 hours back to Portland, rebuild it, and then figure out what to do from there. I (Erik) told him he was nuts. We didn't have any money or any place to store it at the time. Undeterred, Dan rustled up some funds and the next thing I knew he was pulling up to the warehouse with a 24' long truck full of disassembled Circulus.
We realized pretty quickly that the track wasn't built for heavy use and it was so slippery that it was unrideable except at really fast speeds. Thus began a lengthy process of shoring the whole thing up with extra lumber and carriage bolts, as well as coating the whole thing with a mixture of watered down Coca-Cola, an old skate ramp trick.
The rest of the story is below, as filmed and edited by the incomparable James Wilson. The post script is that we did drive Circulus to the Interbike show in Las Vegas where we almost died of stress watching pro racers almost fly over the top of it into the amassed crowd. But all's well that ends well, and anyone who rode Circulus had a smile on their face and wore their road rash (Circulus rash?) as a badge of honor.
Hey, you made it to the end of all of this nonsense! To reiterate what I said at the top of this post, PDW is still around after 15 years because of all the individual people that have supported us: our customers, manufacturing partners, families, friends, bike shops, photographers, videographers, artists, the cycling community, and everyone who has ever been a part of the PDW team. Thank you, thank you, thank you.
Somewhere in between road rides and mountain biking lives the wonderful world of gravel riding. It’s exactly what it sounds like - taking your rig out on unpaved terrain, whether that’s on a chill ride with friends or multi day tour.
When it comes to gravel riding, there’s no one right way to ride or show up - gravel is for everybody! However, since you’ll be doing some riding on chunky rocks and mixed surfaces, a little bit of preparation will go a long way and will also help keep the good times rolling.
Here are a few thoughts on what to bring and where to go.
What bike should I ride?
Any wheels can roll on gravel! Maybe the most important consideration with your bike is your experience rolling over the gravel itself.
You’ll want your bike to feel cushy so you don’t feel every little rock, so making sure your tires have a little bit of give to them will ensure a more comfortable ride. That recommended tire pressure on the side of your tire? You’re going to want to be on the low side of that.
Also- don’t get stranded. Bring along a spare tube, pump, and tire levers to bail you out if you get a flat.
Keeping your hands comfy also goes a long way. Wear a good pair of gloves and treat yourself to cushy bar wrap or grips.
What gear should I bring with me?
Here’s a handy starter checklist!
-A flat kit: Tire levers, spare tubes, and a pump
-Headlight: be ready for a night ride… even if you didn’t plan on being out after dark
-Snacks!
-An extra layer (stash it away with a cargo setup!)
We hope you have a great time hittin’ the gravel!
This thing is so useful. It attaches to the side of your basket so you can mount your light in a way that the beam doesn't get obscured by whatever's in your basket. Between work, school, grocery shopping and getting sidetracked by free boxes along the way, I'm usually piled high with cargo by nightfall. The Outpost Mount makes it possible to have a lit path home even though my basket's full up to my eyes with stuff.
I have a set of these on my fat tire bike that I use as my winter commuter, but they are so lightweight that I just leave them on all year. In addition to looking cool, they keep the mud and slush off me and my stuff. Plus, they are big enough to put bumper stickers on!
On the two bikes I typically commute on, I have bells. One has the Alexander Graham Bell and the other a King Of Ding. You should ride with a bell, too. Do you want to pass pedestrians and cyclists but like me, don't want to shout, "ON YOUR LEFT"? Then get a bell. It shouts for you and its shout, it's so much better than ya know, actual shouting. Both these bells are brass and gives you a nice, clear, loud DING. Honestly, I can't ride a bike without a bell.
Bonus: if you ding a bell at a little kid walking with their parents, you've delighted the entire family. You can't beat that.
I am a Coffee Drinker. I like coffee day and night. I like coffee on a ride. Taking my travel mug with me as I ride to work in the morning is crucial. I like having access to my coffee RIGHT THERE. I don't need to reach down to a bottle cage on my frame. I can't do that in the morning, you kidding me? The Hot Take holds my travel mug snugly. It can hold a cold can, too, on a hot ride away from work or on the way to meet up with friends. The Hot Take isn't too particular about what you're drinking, it's capable and willing to help when you need it to.
Our Full Metal Fenders immediately changed my entire commuting experience for the better. Before I got these fenders, I used only a clip-on rear fender that barely stood up to the muck and grime of the city streets of Minneapolis (my hometown) and Portland alike. With the Full Metal Fenders, my legs and gear are much less thrashed in wet conditions - crucial in Oregon, where we get A LOT of rain in the fall and winter. I also love that they have all black stays, because they go with just about any bicycle color scheme! Hands down the best investment I have ever made in a bike build.
Our Asteroid USB Tail Light is my preferred tail light for a number of reasons that you might find useful too!
I don’t have just one bike, and I also travel and ride other places, so the ability to have lights I can move around quickly is important.
It’s SOOOO bright for how small it is. If you’re riding in dark conditions or find yourself out later than originally planned, it’s always super easy to pack this light and stay safe. Fits in a pants pocket, seat bag, or in my fave- a fanny pack.
Micro USB charge - so simple to power up at your desk during a workday or with a power bank on the fly.
The adjustable mounting bracket fits a wide range of seatpost sizes, which means I’ve never had to fuss about whether or not it fits, or pre-install brackets on multiple bikes.
My absolute favorite products are the Hot Take and Full Metal Fenders but Chris called dibs on the former and Kate on the latter so I'm going with the Takeout Basket.
I've had Takeout Baskets on my road bike, gravel bike, and commuter bike. No matter what sort of riding I'm doing it always seems to come in handy. During my commute it's easy to take extra layers on and off and jam them in there without messing with a backpack or pannier. It's just as useful on a long ride. I had a Takeout on my road bike for a multi-day trek from Spokane to Portland and having my sunblock, snacks, extra layers, phone, tools, maybe a beer, etc all right there and accessible while riding was awesome.
My favorite PDW pick? The Lars Rover, obviously! Besides the amazing name, this light lights up everything and anything I need from the dark backroads to ominous trails at night time. The solid build construction and visible light meter make the Lars Rover my partner throughout the year. The burn time is amazing and it's small enough that I can throw it in my pack in case I'm not sure if I'll get back to civilization before nightfall.
Right behind the Lars Rover comes the Sparrow Cage. I have this cage on my bike-packing, gravel, and fat bike. That just shows you that it transcends all current and upcoming cycling trends that are being thrown at you. While it is sure pretty to look at it is also a top-notch water bottle holder easily securing the bottle over bumpy city streets and rough gravel roads.
]]>
Ben Popper
@gravelcruiser
Ben likes to think of himself as a sweet-bike guy, but in reality he says he is more a dedicated parent that schemes to be a radical cyclist. He can explain it best in his own words, "This means that when I do get out on the bike, when it isn't one of my commutes to pick up the kiddo from school on our tandem, I head out to ride some big, dumb idea I've come up with. It also means that I haven't forgotten the effect cycling had on my youth (and subsequent decades of bike fun times) and I work to instill the essence of freedom and adventure in cycling for our families rides. Whether it is to the grocery store or Wilderness Boundary cycling is fun everyday."
We've got gear for all kinds - a PDW video series
Finding the right lights for your bike can be an overwhelming task given the endless options. Will you be using them during the day, at night, or both? Will you be primarily on dark country roads or on well-lit city streets? Don't stress! We've made this handy guide explaining all of our lighting options to help you determine the best lights for your riding style and needs.
Ideal for commuting, urban adventures, country touring, day and night trips.
The Power Rovers are high power USB rechargeable headlights that kick out a whole lot of light (850 and 700 lumens.) They have a handy battery meter on top, so you can always see just how much charge you have (this is an extremely handy feature!) These lights are good for almost any type of riding but should probably be run at a lower brightness setting or angled down a bit if there is a lot of oncoming bicycle/vehicle traffic so you don’t blind anyone.
The main differences between the Lars Rover Power 850 and City Rover Power 700 are that the Lars has a brighter, more powerful LED, an alloy head to cool off the more powerful LED, and a higher capacity battery to power the more powerful LED.
Ideal for commuting, urban expeditions, country touring, day and night trips.
The City Rover 500 and 700 feature a similar sleek, simple body style as the Power Rovers above. They lack the battery meters that you’ll find in the Power Rovers, but they have the same quality components and build at a lower price. The only difference between these two headlights is that their maximum lumen output is 500 vs 700.
Ideal for e-bikes (obviously), commuting, urban expeditions, and all-weather riding.
The Kepler e-bike headlight is bright, sleek, and [relatively] easy to install. It has a Bosch e-bike motor plug pre-installed so you don’t have to be an electrician to get it working with your bike. That isn’t to say Bosch makes it easy to connect lights to their system. You’ll need to remove your crank arm and open the motor casing to access the light port so you may want to have a bike shop take care of hooking it up. If you have a different e-bike system than Bosch, the plug can simply be clipped off, and the light functions just the same directly wired up.
The Kepler features a European standard beam pattern, which focuses the light onto the road in front of you and prevents oncoming traffic from being blinded. It takes some getting used to if you’re accustomed to the “blast all the light everywhere” style of most bike lights sold in the USA, but people who use this type of light for any length of time swear by them. It is also much more respectful to walkers/other bikers than the standard style beam.
Ideal for commuting, urban expeditions, day and night trips, and all-weather riding.
The Pathfinder USB Headlight is a unique little headlight with a whole lot of technical features packed into a small package at a great value. The Vertical Cutoff Beam is designed to focus the 200 lumen main beam onto the road in front of you and prevents lost lumens that can blind oncoming traffic (similar to the European standard beam pattern on the Kepler e-bike headlight we talked about above.) For daytime riding, the Daytime Running Flash is bright enough to make you seen even on the brightest days. The Battery Meter lets you know exactly how much battery life you have left before needing to recharge. The Pathfinder is designed for daily commuting and rides around town, so the battery is on the small side and run times shorter than some of our higher power headlights, but it’s a great light for everyday jaunts.
Ideal for casual rides around town, day trips, and all-weather riding.
The Asteroid is by far the most low profile, sexy bike light we make. It’s ultra-compact and shines super brightly with high-quality optics so you can be safe and seen. It’s the perfect headlight for city riding where there is so much ambient light that you don’t need a strong beam illuminating the path. Make it a pair with the Asteroid Tail Light!
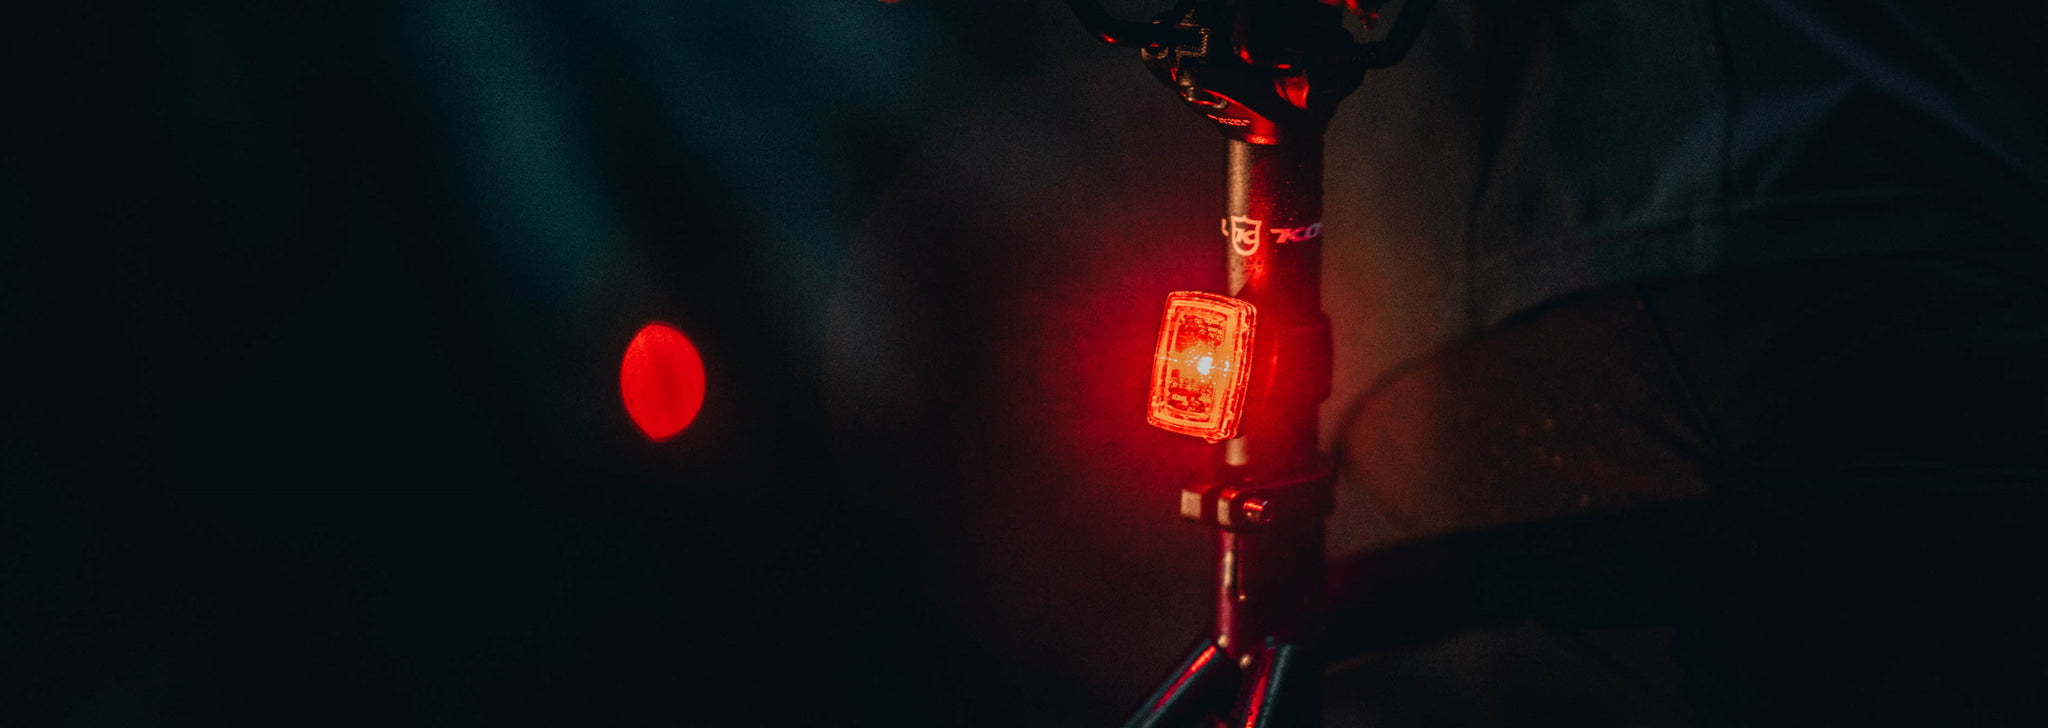
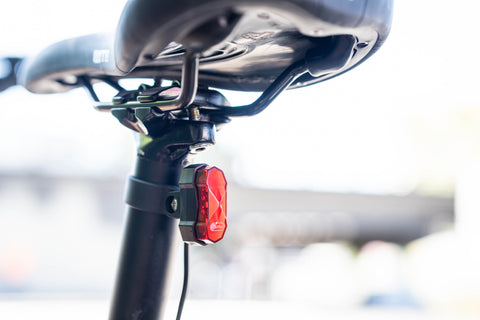
The Gravity+ taillight has a built-in accelerometer that detects deceleration or swerving and automatically changes to a super bright, solid beam to warn following traffic, kinda like a brake light. This light is great day or night on pretty much any bike out there. A lot of e-bike riders prefer the Gravity Plus to hardwiring a taillight to their e-bike system.
The Daybot taillight has a CREE LED to power a 100 lumen Daytime Pulse mode for increased visibility on sunny days (do look directly into this LED! It’s crazy bright!) Switching from the day modes to night modes dims the LED a bit so you don’t blind folks at night. The nighttime modes also conserve battery power.
The USB rechargeable Io taillight has two super bright LEDs for a great value. It has a quick charge time of only 2.5 hours and three different modes: steady, flash, and pulse. This is a nice basic USB rechargeable taillight for just about any type of riding.
Just like the Asteroid headlight above, the Asteroid taillight is by far the most low profile, sexy bike light we make. It’s ultra-compact and shines super brightly with high-quality optics so you can be safe and seen. It’s great for all types of riding and features a double click switch, like a computer mouse, to prevent accidental ons and offs when you aren’t using it.
Small but incredibly bright, the Kepler E-bike Tail Light offers up 220 degrees of visibility. Compatible with any 6V-15V e-bike system, this slick little light is loaded with 3 super bright power LED's. Equipped with a pre-installed Bosch plug the Kepler E-bike Tail Light is ready to plug directly into any Bosch e-bike system. The Bosch plug can also easily be clipped off for direct wiring into other e-bike systems.
The Danger Zone taillight features two brilliant red LEDs focused with precision lenses. It features three modes for up to 50 hours of run time using two AAA alkaline batteries. The Danger Zone is an incredibly simple, bombproof taillight.
The RADBOT 1000 is equipped with an ultra bright power LED and also a large precision reflector so that even if the light isn’t on, you’re still getting the benefit of the reflector’s visibility. The Radbot 1000 comes with both a seatpost mount and a rack bracket so you can mount it directly to your bicycle’s rack.
The Fenderbot taillight bolts directly to your rear full coverage fender, providing bright and theft-proof visibility. Its brilliant red LED runs on two AAA batteries and the oversized precision reflector works nonstop to bounce ambient light for added brightness in low-light environments. Fenderbot installation is an easy DIY project.
If you made it to this blog post, chances are you are interested in one of our full coverage fender sets. Sweet! We’re excited to discuss fenders in greater detail so you can be sure to choose the best set for your bike. If you already have a set of our fenders, please use the more detailed instructions available here, and use the below guide for supplemental tips and tricks.
We work incredibly hard to continually improve the design and fit of our fenders, ensuring they are always the best on the market. We created this guide to help answer common (and not so common) questions about proper fit and installation. Please note that while we have tried to be as thorough as possible there is no substitute for the accumulated knowledge of the mechanics at your local bike shop. Remember, if you feel like you're in over your head then go to your local bike shop and have a professional help you select and install your fenders.
Okay, let's dive into clearances and measurements. Finding the perfect fit will ensure maximum splash coverage from the elements and help you have a worry-free ride.
The first measurements to look at are the areas on your bike’s frame and fork where the tire gets close. You can see the minimum distances you’ll need to have for different sizes of fenders on the chart below. If you are willing to bend the fenders a wee bit, you can probably get by with *slightly* tighter tolerances than what we list here.
These are the areas on your bike’s frame and fork where you will need to anchor any full coverage fender. We’ll elaborate on each of these mounting points later in this article.
You will need a hole through your fork crown in the front, back, or both. If you have the option, it is always better to mount the fender front hanger to the front of the fork crown so you have more protection from water spinning up off the front of your tire.
If there is only a hole underneath the fork crown, you can drill a hole in the fender and mount it directly to the underside of the fork. Always use large leather or rubber washers between both the bolt/fender and fender/fork. This will allow you to snug up the bolt connecting the fender to the fork while dampening some of the vibrations that may cause a rattling sound. Note: Any hole added to your fender provides a new stress point and that can increase the chance of breaking.
Bikes With Disc Brakes: Many disc brake calipers on modern bikes are low profile and do not interfere with a fender stay attaching to the eyelet near the dropout. For those that do interfere, you can either space the fender stay out from the eyelet with washers or Presta valve nuts to avoid the brake. You can also use one of our Disc Brake Spacer Sets to do the job.
Bikes With Thru-Axles and No Eyelets: P-clamps from your local hardware store can be used around the lower fork stanchions to attach the fenders stays to. **Be sure to check this kind of setup frequently to make sure the p-clamps are solid and not sliding down your fork**
Bikes With Quick Release Skewers and No Eyelets: You can use our handy Eyelet Sets that attach to your quick release skewers. P-clamps (as above) also work and will allow you to remove your wheel more easily. If you are attaching fenders to eyelets that are at the mid-point of the fork you may need to cut down the stays to appropriate length. This is relatively simple and can be done with a hacksaw or even a sturdy bicycle cable-cutting tool.
If your brake bridge has an eyelet on the bottom rather than a hole that works with our standard rear hanger you can use our special Rear Hanger for Braze-ons Under Brake Bridge to directly bolt to the eyelet. This is preferable to drilling a hole in the fender, which will weaken the structure of the fender.
If your bike does not have a brake bridge it is going to be almost impossible to mount the rear fender. There are a couple of creative solutions we’ve seen but they are going to take some serious DIY spirit and the results may vary. Try these at your own risk!
Bikes with Rear Racks: Ideally your bicycle will have two sets of eyelets so you can mount your rear rack to one set and your fenders to the other. If you only have one set of eyelets you’ll have to mount the fender brackets to the outside of the rack legs. If you have a PDW Everyday Rack, there are mounting holes for fenders built right into the rack for you to mount your fenders to.
Bikes with Disc Brakes: Just as we noted above, many disc brake calipers on modern bikes are low profile and do not interfere with a fender stay attaching to the eyelet near the dropout. For those that do interfere, you can either space the fender stay out from the eyelet with washers or Presta valve nuts to avoid the brake. You can also use one of our Disc Brake Spacer Sets to do the job.
Ideally you have a chainstay bridge with a threaded eyelet. If this is the case you will probably want to space the fender out from the chainstay bridge a bit so that the fender fits closely with the curve of the tire. Washers, Presta valve nuts, or one of our Disc Brake Spacers will work well.
If you have a chainstay bridge with no threaded eyelet you should still be able to run one burly zip tie through the fender and around the bridge without any trouble.
If you don’t have a chainstay bridge at all you can run two zip ties through the hole in the fender and around each chainstay. Make sure to tighten the zip ties evenly so the fender is centered on the tire.
]]>Back in February when we were in the Upper Midwest at Frostbike, Jeff Frane fromAll City Cycles reached out over a can of Grain Belt and let us know that the gang from AC be swinging through the Pacific North West on a Demo tour. He wondered if we’d like to hook up with them for an event. We said ‘of course!’
Fast forward a few months, and Jeff and Nate did indeed swing through Seattle, Tacoma, Portland and Bend on their “Excellent Adventure” tour. After a picnic with our pals at Swift in Seattle and a demo day with Western Bike works here in Portland, the boys posted up at Revolver in NoPo on a cool but dry Thursday night.
At around 7 as the shop closed down, a strong posse rendezvous’d at the shop where Jeff and Nate shared some beers and ciders they’d bootlegged from MN. With about 35 riders in tow, we hit the road north to meet up with the Columbia River Slough Path to take a Slow Ride to Kelly Point Park.
Sometimes with that many folks along, things can get weird, but once everyone was safely on the Slough Path, the pace mellowed out and from what I can tell folks had a very nice ride. Earlier in the day, I’d taken a load of firewood out to the island and stashed it on the way to the city dump. As we arrived at the meet up spot, everyone grabbed an armful of dry wood, and retreated to the beach along the mighty Columbia River.
At the river we made two piles: One of shared firewood, the other of shared beer, cider and sausages. We watched the sun go down, were visited by a solitary sea lion a long ways from the sea, marveled at some huge ships, shared some cold ones and made some new pals. All in all, exactly the kind of thing you can hope for on a Thursday night.
Inevitably as happens with all bonfires, we burned all the wood and drank all the beers. Leaving only tire tracks in the sand, those of us remaining pointed our wheels back towards town, and rolled back towards warm beds.
I was reminded of what a good time I’ve had with other folks because of bicycle. They’ve introduced me to cool folks all over the world. It is a great pleasure to share our city with them when they come to visit. I was also reminded the long winter of epic rains in Portland has come to an end. Here is to a long summer of night ride to fun spots!
To Jeff and Nate, thanks for stopping through Portland. We hope you had as good as a time with us as we had with you!
]]>Rain jackets protect riders from falling rain. But fenders are the best defense for water flung up from your bike's wheels splashing through puddles – they block the scummy water from the road or mud from the trail from soaking you and your bicycle. Fenders help keep your legs and shoes dryer and prevent dirt and debris from gunking up your chain, derailleurs and brakes, extending the life of those parts.
Riders should choose fenders that fit both their bicycle and their riding style:
All-weather city and road riders with standard 700c or 650b wheels should consider full coverage fenders for the highest degree of protection with longer blades that more completely surround the wheels. Full coverage fenders typically come with mounting equipment to hold the fender blades with increased stability to prevent rattling or bouncing. Installing full coverage fenders can be challenging depending on the bike frame and may require professional problem solving to ensure the perfect fit. Full coverage fenders are usually a more expensive option but are more durable and often rebuildable.
Fair-weather riders may find a better fit in easy-install or clip-on fender styles. As their name suggests, easy install fenders are usually very quick to mount to or remove from many different styles of bicycles and wheel sizes (26, 29/700c, 650b) – usually with a quick-release or one-bolt mount. Easy install fenders cover much less of your wheels, so they won't stop all the road spray, but they’ll keep the worst of the wet off your backside and out of your face.
Trail riders are usually best served by easy install fenders that can be mounted or removed depending on the current weather conditions. Easy install fenders also will also fit a wide range of wheel and tires sizes - from standard to fat bikes.
]]>Find the gear you're looking for more efficiently with our new filter features. Now it's a snap to find that #smallpart to fit your #fullcoverage #cityfenders.
Explore our curated collections, making it easy to discover great gear for your cycling style! We've got collections for Winter Commuting, Custom Fender Fit, Mountain and Fat Biking and Road Cycling.
When you've found the gear you need, breeze through the improved checkout process - just select your desired shipping method and payment option, including Paypal and Apple Pay for mobile. Speaking of shipping - for a limited time all orders over $50 ship for FREE and we now offer shipping to international addresses!
Once you've received your gear, come back to the site for help with any questions. Check out our FAQs and Manuals page for instructional and installation assistance. Our library of Instructional Videos are now organized and easier to watch! Feel free to leave a review and share your thoughts with our community.You can now submit a warranty claim through our site or be in touch through our easy Contact form.
Looking for the fun stuff? Check out our Stories page for lifestyle videos, pretty photos and, of course, stories!
So, that's the 10 cent tour. Take a look around and let us know what you think. We're always interested in feedback from riders who use our gear! Thanks for your support and we'll see you on the road/trail/path.
]]>The rack mount fits most bike's seat posts (22.0-31.6 mm) and installs in seconds using a 5mm Allen key. The Bindle is rated to carry up to 5.4 kgs (12 lbs). The innovative design eliminates the potential for side-to-side sway while riding and rear wheel rub for riders with short seat posts.
“This rack has been a couple years in the making. Dan Powell had the idea of a simple bikepacking rack that could handle all sizes and shapes of gear – most notably a growler of beer.” explained PDW General Manager, Erik Olson. “We’ve refined the Bindle over six prototypes, making improvements on each iteration until arriving at this final design.”
PDW is pleased to offer the Terrapin Drybag by Revelate Designs as a product add on for Bindle Racks ordered through their online shop. The Terrapin is 3d welded and offers a tapered shape that fits the rack platform perfectly and includes an air purge valve for easy compression. Each rack ordered from PDW will also include a custom designed patch by Bicycle Crumbs, as well as a Leave No Trace reference card for mountain biking.
]]>
Even if you didn't make it to northern California for the Sea Otter Classic, you probably saw a bunch of photos of a bike that made it's big debut during the expo - the Franco Bicycles Grimes, designed by Bicycle Crumbs. This bike started blowing up our Instagram feed, and it's not hard to see why. The collaboration resulted in an amazing functional and capable bike with a stunningly gorgeous paint job. We here at PDW were way excited to see that Crumbs had selected our Full Metal Fenders to round out his build! While we've seen out fenders painted in many different ways, his design was by far the most intricite we've ever seen grace the curves of the Full Metals. So we reached out to him to chat about the process from ideation to realization, and here's what we learned:
PDW: Hey Crumbs, really impressive job with this build and design. Could you tell us the story behind this bike?
Crumbs: The story behind this bike is pretty rad I think. Franco reached out to me after seeing my NAHBS bike. They take a lot of pride in giving a customer exactly what they want. In a way the project was a partial test of that. They gave me completely creative control over the paint and build. As I do pretty often, I pushed them to their limits but they absolutely came through and delivered something spectacular.
PDW: What was your inspiration for the design?
Crumbs: My inspiration for this bike gets pretty design dorky but I'll gladly talk about it. To start - when I get projects like this, I researched as much as I could about the company before I agreed to take on the project. I saw Franco is inspired a lot by vintage racing cars and motorcycles. I'm not a car person now, but I loved vintage cars as a kid.
Specifically cars and trucks from the 1950s with big bulbous wheel wells. Now, this is where it gets weird - my design inspiration works a lot like word association games. I sort of let my thoughts take over and then blur the ones that are connected. This project worked like this: 1950s Chevy trucks > Route 56 > American southwest > deserts > minerals/stones. Ha! So at each one of those "stops" I did a little bit of visual research. I happened to find this turquoise stone with a very specific blue that I isolated for the frame color and a rock that looks sort of like craft paper, with specs and flakes of reflective material, for additional design inspiration. I was also struck by how sunsets are soooo red in the desert. I tried to mimic that feel with the orange red concentric circle areas. I then placed that color/pattern next to the blue to create a lot of color vibration, which is good for visibility. These swatches were then placed in areas on the bike which would benefit from added visibility. Once I got this far, I knew I wanted to cover as much of the bike as I could with this color, which means covering the logos for some components. I'm big on supporting the brands that I believe in, so rather then leaving them blank, I redrew all of the logos. This was better then replacing them with the real logos. I often feel bikes have too many conflicting logos and this was a great way to prevent that.
Recently, I've been receiving some negative comments and emails from trolls basically thinking I was a rich kid with money to blow, based on my online presence. It really struck a nerve, because I have worked so hard this last year to build Bicyclecrumbs up and to be able to get a dream bike. I felt those people just didnt respect the countless hours I've put into this. I sort of spec'ed this bike as a big FU to those people. It's unapologetically over the top in every way. This is also why I adopted the house fly as a personal symbol for this bike and myself. The fly survives by consuming waste - by feeding off of every opportunity available. This all lead me to the idea of "build the bike you want and don't give a shit what others think." This bike is that.
PDW: Why did you choose to complete the bike with the Full Metal Fenders?
Crumbs: I knew from the start of the project that the best way to get that bulbous 1950s car look would be to use fenders. Yours are the ideal choice - metal, paintable, with detail and high quality. I couldn't think of a better option. Honestly, that part was easy.
PDW: Awww, thanks Crumbs! Okay, last question: What else do you have the works that we can look forward to?
Crumbs: As for projects in the works,I have two more BIG ones scheduled for this year. One is bikepacking rig with Pinion Gearbox. The other I can't talk about yet. I'm also looking for an Interbike project. I don't know why but I love bike trade shows, probably because I've only been doing this for a year!
]]>
My goal was the first thing I saw when I woke up. Pulling back the curtains from the bedroom window there it was, a shuttered Goat Peak Lookout, five thousand snowy feet above the Methow Valley floor. The snow has been gone from the valley (2,000’ elev.) for weeks. They stopped grooming the community cross country ski trails April first, but Snowtel sites are reporting upwards of one hundred inches of snow at 6,800 feet. So somewhere between my warm bedroom and the wind swept summit of Goat Peak I was going to ride into snow, and a lot of it.
Getting skis onto my Rock Lobster gravel bike was a bit of a challenge. It wasn’t built to be used with racks and thus is lacking in attachment points. Luckily I had been given an early production sample of Portland Design Work’s new rear rack, the Bindle. With that attached to my seat, I was able to put the extra cloths for skiing in a dry bag and strap the skis to the rack and frame. It was a little awkward, but made for an excellent wheelie bar on the steep pitches of road.
Bike loaded, I hit the road at a leisurely pace. Being on the East side of the Cascade Mountains the road broke from dense forest to expansive views early making for frequent stops to rest the legs and soak in some much needed sun after a long Pacific Northwest winter. With a keen eye out for bears, I rode into the cold foreboding wind, past wildflowers and rushing creeks from melt off. There seemed to be water everywhere. If the brisk breeze was my first missed clue, the rushing water on the side of the road should have been a tell all.
Ten miles in, right at about 4,700 feet, I was stopped by snow. Literally. I rode into it and came to an abrupt stem to soft spot crumple. I stashed my bike behind some bushes and found a dry rock to change costumes. The first mile on skis was a downhill warm up. Soft snow doesn’t make for easy gliding, so I was already kicking my wide back country cross country skis to keep momentum. Downhill. Climbing (and descending) fire roads on skis is exactly the same as on a bike, just at one third the speed. It hurts going up and is kind of sketchy coming down. With great views in every direction, two hours, four miles and another 2,000 feet higher, I came to the trailhead for the Goat Peak Lookout. In the summer, you can just drive here.
The terrain gets steep and the route finding difficult. Without a marked trail, I find my way to the final, heavily corniced ridgeline with a topo map. It seems though, that with each push higher, the view gets exponentially bigger and better. So, pushing my boundaries, I make my way around the ridge to where I think the trail would be on the other side. From here the course of my day will diverge. My first option, with some careful planning from my West facing outcropping, I can see a route down, across, around and back up to the lookout. A careful time consuming traverse. Or, I can take off my boots, sit down and enjoy a beer, some salami, hard cheese and the amazing view. I know that it would be better on the summit, but my quotient of fun to risk has been maxed out, this is a perfect end to my climb.
The fire road decent back to the car/home/camp is always unremarkable compared to the climb. The same amazing views, the bone rattling washboard turns, the nagging want for an ice cold beer and some candy. This one, although much the same on the skis once on the road, started with some exhilarating, steep and sloppy turns on skis. How I yearned for an alpine boot and binding at that moment.
When I first hit the snow I was discouraged. I had been hoping to make it a couple miles further on the bike. I didn’t think I had it in me to make it the four miles to the trailhead on skis. Still unsure of my ability to tackle the final ski to the summit. Then I reminded myself, the entire point of this trip was a multimodal overland journey. I wasn’t trying to beat any records or discover unknown territory. All I wanted was to get out and see the mountains, and I got that in spades. All told, I traveled 30 miles (10 up by bike, 10 out and back on the skis and then 10 back down to home) and climbed 5,300’ from the valley floor. Regardless of reaching the summit, it was a success for my soul.
]]>(Behind the scenes at our video shoot.)
]]>